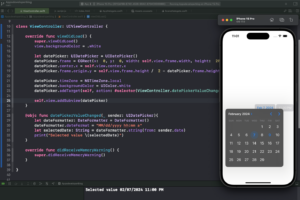
In Swift, UIDatePicker is a user interface component that allows users to select a date or time. In this tutorial, I will show you how to create UIDatePicker programmatically.
Step 1: Create an Instance of UIDatePicker and Set the Frame
Inside your view controller’s viewDidLoad() method, instantiate a UIDatePicker and define the size of the frame.
// Instance of UIDatePicker
let datePicker: UIDatePicker = UIDatePicker()

// Set the Frame
datePicker.frame = CGRect(x:  0, y:  0, width: self.view.frame.width, height:  200)
Step 2: Position UIDatePicker Within a View
To ensure the UIDatePicker is positioned correctly within the view, set its center.x property to match the view’s center and adjust the y origin accordingly.
datePicker.center.x = self.view.center.x
datePicker.frame.origin.y = self.view.frame.height /  2 - datePicker.frame.height /  2
Step 3: Add UIDatePicker as a Subview
Once you’ve configured the UIDatePicker, add it as a subview to your view controller’s main view.
self.view.addSubview(datePicker)
Step 4: Change UIDatePicker Background Colour
You can alter the appearance of the UIDatePicker by changing its background color. Here’s how to set it to white:
datePicker.backgroundColor = UIColor.white
Step 5: Handle UIDatePicker Value Changed Event
To respond to changes made by the user, you need to implement a target-action pattern. This involves setting a selector method that will be called whenever the UIDatePicker‘s value changes.
datePicker.addTarget(self, action: #selector(ViewController.datePickerValueChanged(_:)), for: .valueChanged)
Step 6: Set UIDatePicker Local Time Zone
By default, the UIDatePicker uses the current system time zone. However, you can explicitly set it to use the local time zone.
datePicker.timeZone = NSTimeZone.local
Step 7: Use NSDateFormatter to Format the Selected UIDatePicker Value
When handling the value change event, you can use NSDateFormatter to format the selected date into a human-readable string.
@objc func datePickerValueChanged(_ sender: UIDatePicker) {
    let dateFormatter: DateFormatter = DateFormatter()
    dateFormatter.dateFormat = "MM/dd/yyyy hh:mm a"
    let selectedDate: String = dateFormatter.string(from: sender.date)
    print("Selected value \(selectedDate)")
}
Complete Code Example
Here is the complete code example for creating and configuring a UIDatePicker programmatically in Swift:
import UIKit

class ViewController: UIViewController {

    override func viewDidLoad() {
        super.viewDidLoad()
        view.backgroundColor = .white

        let datePicker: UIDatePicker = UIDatePicker()
        datePicker.frame = CGRect(x:  0, y:  0, width: self.view.frame.width, height:  200)
        datePicker.center.x = self.view.center.x
        datePicker.frame.origin.y = self.view.frame.height /  2 - datePicker.frame.height /  2

        datePicker.timeZone = NSTimeZone.local
        datePicker.backgroundColor = UIColor.white
        datePicker.addTarget(self, action: #selector(ViewController.datePickerValueChanged(_:)), for: .valueChanged)

        self.view.addSubview(datePicker)
    }

    @objc func datePickerValueChanged(_ sender: UIDatePicker){
        let dateFormatter: DateFormatter = DateFormatter()
        dateFormatter.dateFormat = "MM/dd/yyyy hh:mm a"
        let selectedDate: String = dateFormatter.string(from: sender.date)
        print("Selected value \(selectedDate)")
    }

    override func didReceiveMemoryWarning() {
        super.didReceiveMemoryWarning()
    }

}

Conclusion
I hope this tutorial was helpful to you. You now know how to create a UIDatePicker programmatically.
To learn more about Swift and to find other code examples, check the following page: Swift Code Examples.
Keep coding, and happy learning!