In this tutorial, you will learn how to start MySQL in a Docker Container. But before we begin, please ensure that Docker is installed on your system.
If you need more information about Docker, please visit the Docker Tutorials page.
Step 1: Pull MySQL Docker Image
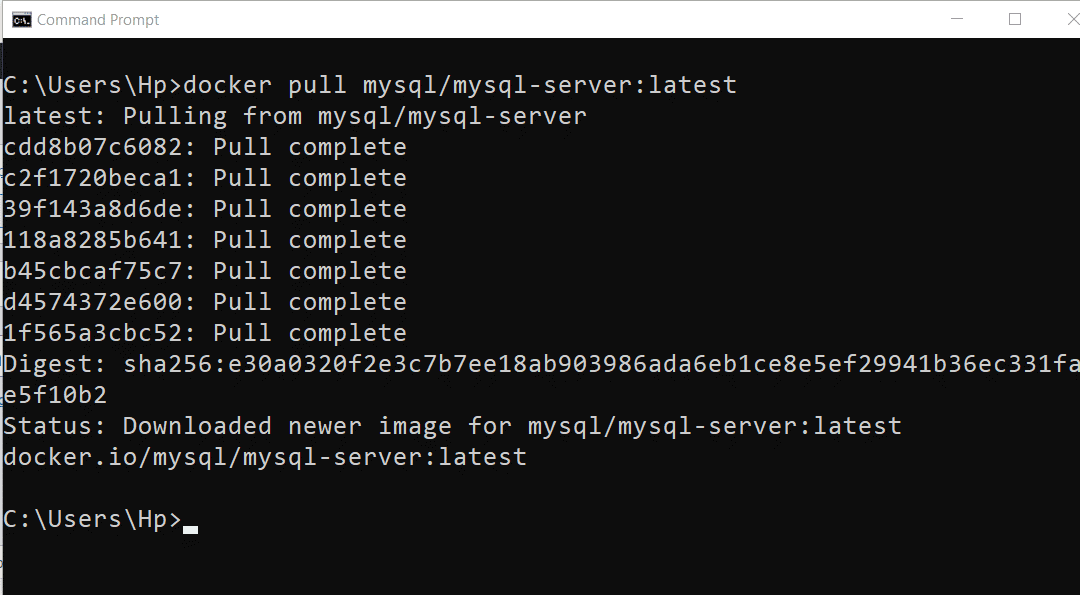
The first step is to pull the MySQL Docker image from Docker Hub. To do that we use docker pull command.
docker pull mysql/mysql-server:latest
Here’s a breakdown of the command:
dockeris the command-line interface for Docker.pullis a command that downloads an image from a registry.mysql/mysql-serverspecifies the name of the image to download. In this case, it’s the official MySQL image maintained by Oracle.:latestis the tag of the image to download. It specifies that we want to download the latest version of the MySQL image.
Once you run this command, Docker will download the MySQL image and store it on your local machine. You can then use this image to create a container and run MySQL in it.
Step 2: Docker Run Command
Now that we have pulled MySQL Docker image, we can use it to run Docker container. To run Docker container we use docker run command.
docker run -d -p 3306:3306 --name mysql-docker-container -e MYSQL_ROOT_PASSWORD=sergey -e MYSQL_DATABASE=photo_app -e MYSQL_USER=sergey -e MYSQL_PASSWORD=sergey mysql/mysql-server:latest
Now let’s deconstruct the command.
- docker run command first creates a writeable container layer over the specified image i.e. mysql/mysql-server:latest and then starts it using the specified command.
- -d prints the container ID and runs the container in the background.
- -p publishes a container’s port(s) to the host.
- –name sets the name of the container i.e. mysql-docker-container.
- -e sets environment variables. Here MYSQL_ROOT_PASSWORD, MYSQL_DATABASE, MYSQL_USER, and MYSQL_PASSWORD have been set.
- With the environment variables, we have changed the root user password, named a database that will be created when the image starts up, created a user that will be granted superuser permissions for the database created, and set the password of that user.

Congratulations! You now have a MySQL server running on your computer in a Docker container.
Step 3: Interacting with the MySQL Server Inside the Container
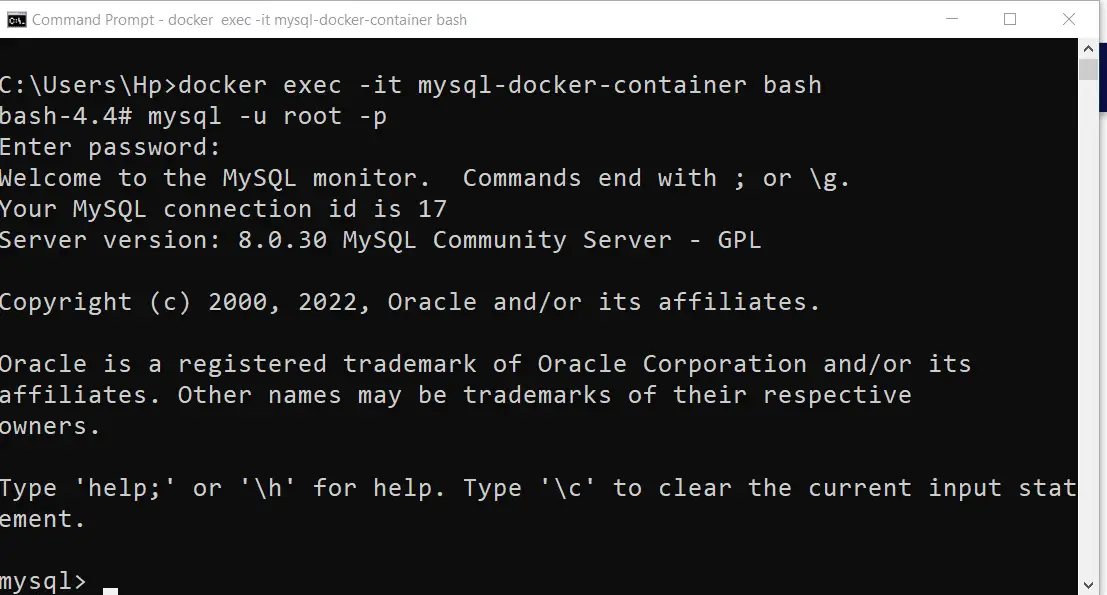
After starting your Docker container, you can enter it and run commands inside the container using the docker exec command.
sudo docker exec -it mysql-docker-container bash
Now let’s deconstruct the command above.
- The docker exec command runs a new command in an already running container.
- This command creates a new interactive bash shell in the mysql-docker-container through -it that tells Docker to allot a pseudo-TTY connected to the container’s stdin.
In the bash shell, enter the following command to invoke MySQL with the root user.
mysql -u root -p
Next, you will enter the password which you had set when running the docker run command. In our case, the password of the root user is set to sergey.
Running SQL commands
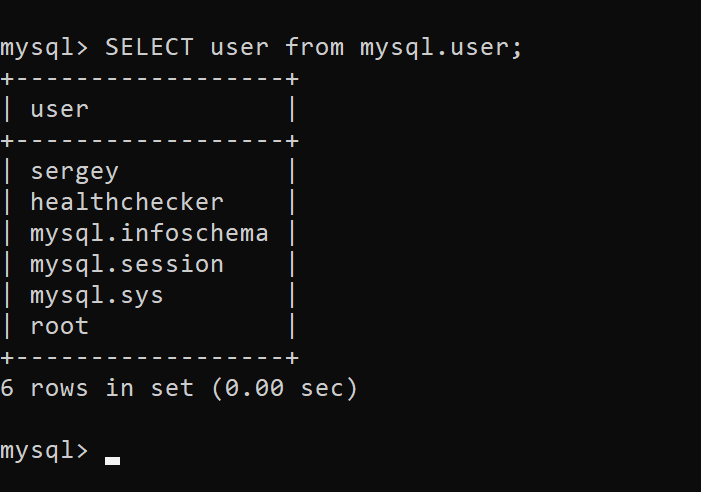
Let’s have a look at the users of the system database i.e. mysql with the help of the following query.
SELECT user FROM mysql.user;
In the output, we can also see the user sergey created during the docker run command execution.
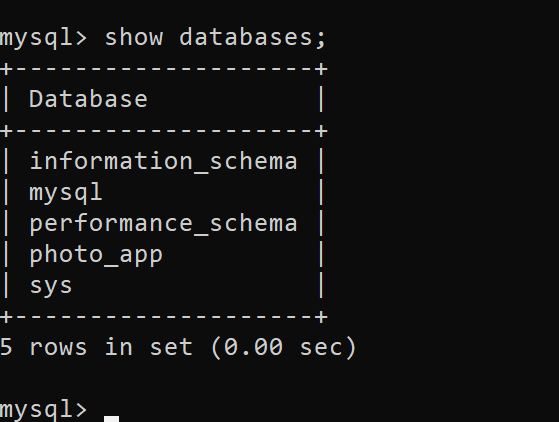
Now let’s have a look at list of the databases with the following query.
show databases;
Here we can see the photo_app database created while running the docker run command.
Creating a New User
Now let’s create a new user by running the following SQL statements.
CREATE USER 'new_user'@'localhost' IDENTIFIED BY 'helloworld';
GRANT ALL PRIVILEGES ON *.* TO 'new_user'@'localhost';
FLUSH PRIVILEGES;

Now that we have created a new user, let’s run the SELECT command on the user table. We should see a new_user added to the table called user.
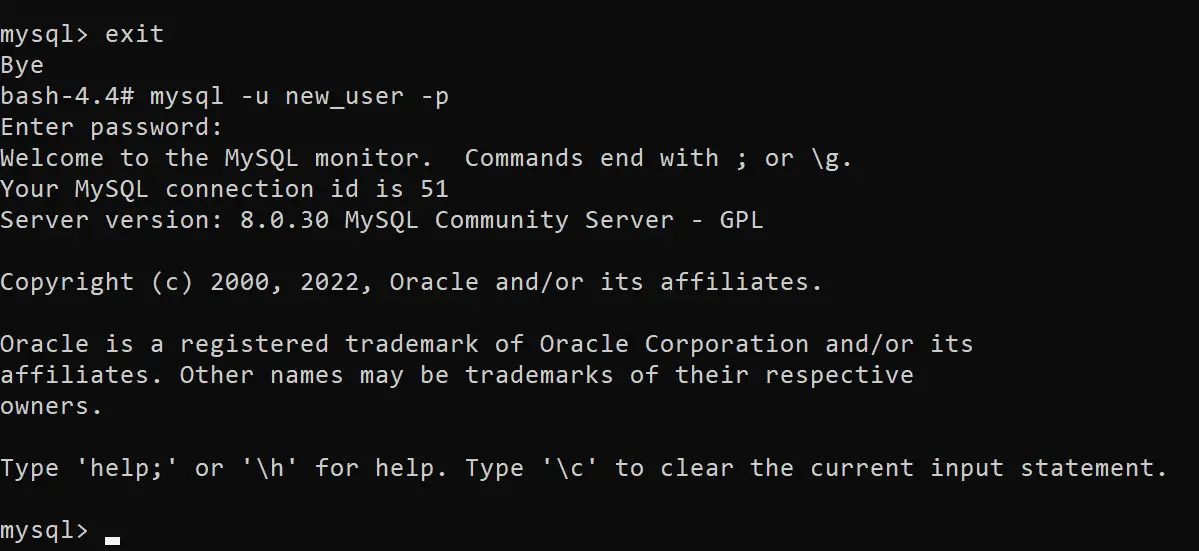
Finally, let’s log in to MySQL with the new_user with the password helloworld.
To do that:
- Type
exitto exit the current MySQL session, - The login to MySQL with user credentials we have just created. You can see how to do it on the image below:
Conclusion
In this tutorial, we learned how to start MySQL in Docker container and also executed SQL commands inside the Docker Container.
Stay tuned for some more informative tutorials coming ahead and feel free to leave any feedback in the comments section.
Happy learning!

